

Steering & stopping
7th December 2004
Lots of things gone on the car over the last 3 weeks, unfortunately lots of things going on elsewhere too so I haven't had time to write anything about it.
After bolting the rear end together I decided to make a concerted effort to sort the front out. For too long it's been hanging unconnected waiting for me to sort out the camber, which in turn has been waiting for me to get the chassis level so I can measure where vertical is properly. After levelling the chassis by way of some small blocks of wood I started trying to adjust the camber. It turns out (and this is a good tip - pay attention at the back) that the camber setting at this point is just to get the car together. Once everything is on you need to get it re-set properly by a garage with some professional alignment equipment.
As ever, there was a problem - the top balljoint doesn't move far enough to properly bolt into the hub when the suspension is at full droop. It turns out you need to jack the front suspension up slightly to a point where it will go together, so "full" droop is actually only as far down as the top balljoint will allow when it's all done. Upon removing the jack on the passenger side the front suspension dropped by about an inch, but this was not the case on the driver's side. Plenty of head-scratching ensued and double checking of the camber (correct) and the chassis was still level (it was) and finally I resorted to measuring the chassis to see why one side was sitting lower than the other. To my surprise I found the passenger side mounting points were welded about half an inch further back than the driver's side and hence the geometry wasn't symmetrical (see photos).
A few panic emails to the CRC forum and it appears that this is a design "feature" of the Sumo and actually not the worst that has been seen. Apparently it's all fine once the car is on the ground, but it rattled me slightly that I could be ploughing thousands of pounds into a car that ultimately I might not be able to drive. Panic over I figured to live with it and hope that it really will be fine once it's finished - after all hundreds of other owners can't be wrong can they...
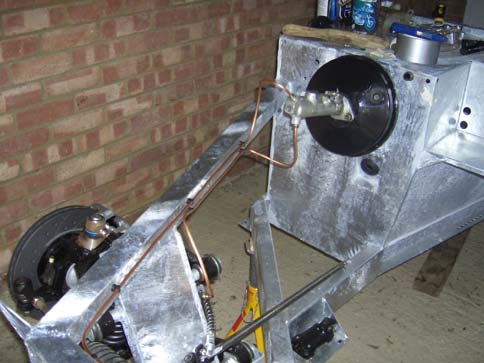
Front suspension done I mounted the steering rack in preparation for re-tapering the hubs. For those unfamiliar with the Sumo, the ends of the steering rack that attach to the hubs (the track rod ends) were originally attached from under the hub on the Granada and the hole they go in is tapered from bottom to top. On the Sumo the track rod ends fit into the hub from the top, so the taper has to be reversed. You can either buy an expensive tapered drill bit or hack up an old track rod end with an angle grinder and use it in a drill with some valve grinding paste. I chose the latter option and after an hour grinding the old end into a shape that would fit in my drill it took all of five minutes to grind the tapers correctly. Dead easy.
Now I could attach the steering rack to the hubs which meant I had to fit the steering column to the rack and the steering wheel to the car so I could turn the wheels and make car-like noises!
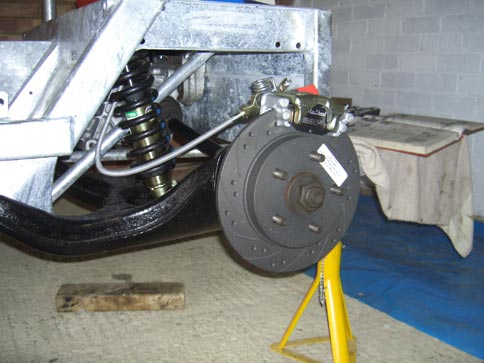
Meanwhile I had orderd some fanastic looking Black Diamond cross drilled and grooved brake discs to replace the rusty rubbish that came with the donor bits. Just look at the photos - they are mean looking! I hope they stop just as well. With those on I could mount the calipers and attach the handbrake cable to the rears.
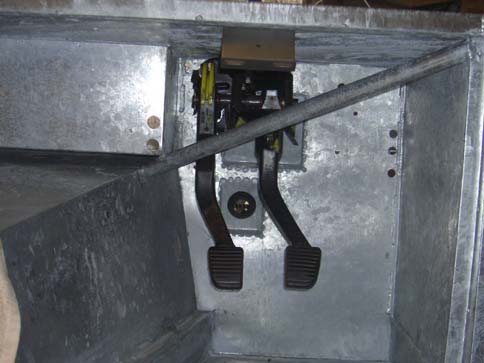
Now it was time to mount the pedals and start making some brake pipes. The pedals went on fairly easily, just two nuts to attach. I had to file some of the galvanising zinc away from the hole at the top of the bulkhead to allow the clutch cable tube to pass through it properly.
The brake pipes were nerve-racking to start with. Not least because they are literally life or death items, but also because I had ordered 25 feet of copper piping and had discovered that you need about 22 of those to do the front and rear pipes. Not much room for error! In the end they were actually very easy (well the front pipes at least, I haven't got to doing the back yet). Drill holes for the pipe clips, measure the correct length using some wire, mark up the copper tube, get paranoid and recheck the wire is really the right length, re-measure against tube, maybe one more round for good luck, then attach pipe cutter and chop! The driver's side pipe is very short so it's an easy starter for ten. On the passenger side I made the mistake of flaring the end before putting the union nut over it so had to chop it off, put the nut on and reflare it. The pipes were very easy to bend by hand and clipped into place without any bother. The only sticky point was that I hadn't been able to source a locknut to attach the flexible hoses from the calipers to the chassis properly so I haven't yet connected the pipes together. I tried all the local factors, an olde worlde ironmongers that had every nut except the ones I needed and in the end I've ordered them from Margnor in Guildford. Hopefully they'll arrive tomorrow so I can finish the job.
Once the pipes are finished I'll need to bleed the system and check it all works. I've got to mount the fuel tank and fuel lines (and order a fuel pump too) and possibly mount the radiator (though I have a feeling it has to come off again to fit the engine). Looks like I'm actually going to have to get of my behind and source an engine and gearbox - eek! I think I'll probably wait till after christmas now before doing that not least because I need to acquire some funds somehow. I probably should start finding out what the lead time is on the body too as I may have to order that soon to avoid a lengthy wait for its arrival. More expense!!
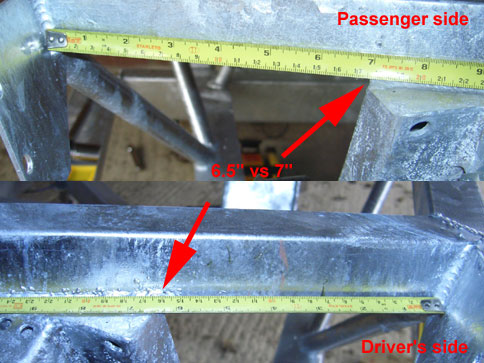
Wonky welding

Steering rack and lower column

Insert appropriate
screeching noises here!

Grrr!
Raar!

The full effect
Do these need an explanation?
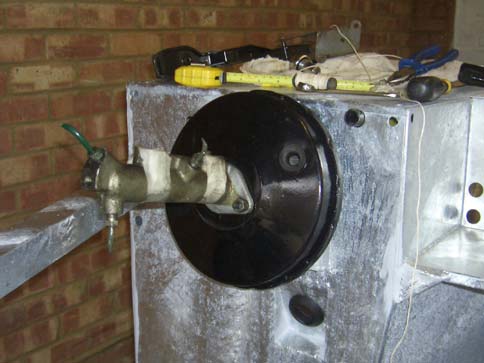
Brake servo
My shiny new pipes