

Body goes on
28th December 2005
Season's greetings to you all, hope you had a good christmas! I must have consumed at least my own body weight in turkey and alcohol over the past week, so now it's back to sobriety and a lettuce diet for a while (at least until New Year's Eve!).
The weekend after my last missive, I managed to coax my wife out to the garage to lend a hand lifting the body onto the chassis. The first step was to tidy the garage a bit (the chassis and body were somewhat buried under various oily rags, tools and spare parts). Once done, I decided to take the brave/foolhardy step of trying to drive the chassis out the garage under it's own steam. As I hadn't had a chance to test the new clutch arrangement yet it was a perfect opportunity to see if the effort had been worth it. Firing up the engine (still massively loud even with the headers on) I dipped the clutch and put it in first (no crunching, good start) gingerly lifted the pedal and... result!! Drive was smoothly engaged and the car crept forward - yey! Stopping was a little less dignified - turns out the brakes really haven't been bled all that well and instinctively pulling on the handbrake instead just served to remind me I had forgotten to reconnect it. Nevertheless, a foot out the side stopped the car eventually, fortunately I hadn't accelerated any faster than a brisk walking pace!
Dropping the body on was straight forward, just lift it over the top and lower into place. Once on I noticed that the body was catching at the rear of the sills against the suspension nuts. Tony at Pilgrim told me that I needed to trim a bit off the tub to let it fit correctly. The reason is that the Jaguar-based chassis is slightly different at the rear and it's easier for Pilgrim to make one body mold to suit both than to make different versions for the Ford and Jaguar donors. We pushed the car back into the garage as now the exhaust headers were pointing directly into the tub and I didn't fancy burning a hole in it with the engine running.
With the body on it was time to center it and pin it in place. Using a spirit level and a tape measure I centralised the rear and put a couple of pop rivets on the lip behind the seats. This sounds easier than it was. First I had to re-level the chassis which took a bit of fiddling then it was a case of measuring and re-measuring for about half an hour, back and forth between each side. Finally I was sure it was in a central position so I put two rivets in the lip behind the cockpit and then I put a few around the boot floor, just to hold it in place. Up front it was just a case of making sure the nose cone was central on the chassis and drilling two holes and fixing it with some bolts and penny washers.
Meanwhile I had been in contact with Graham again as he had been investigating the prices of lights and wiper kits. He had discovered a supplier (Premier Wiring) that could supply the items for about half the price of Pilgrim and would give us a bit of a discount for a combined order. I sent him my list of requirements and he arranged to order them on my behalf with his stuff.
Back in the garage I decided to have a look at fitting the doors to see how much of a job this was going to be. Fitting the doors to a Sumo is something of a rite of passage and by all accounts a very painful and laborious process to get right. With some trepidation I cut the holes for the hinges, fitted the hinge plates, then offered the drivers door up to see how it would look. "Pretty disastrous" was my first impression. The flashlines on the door were too big for even a trial fit and the panel gaps looked like they would be about a foot all round even if the flashlines were removed. Cue sucking of teeth, a brief consideration of the novelty of driving the only open-sided cobra and eventually resignation to the job of attacking the flashlines with the usual razor blade and wet-n-dry paper combo for a very cold hour.
The second attempt (with flashlines now removed) fared a little better, the door at least looked less like you'd be able to get in and out the car without opening it. However, without seriously pushing the sills in by about 4 inches the hinge arms wouldn't close enough to prevent the door sticking out at the front and it was completely out of line with the body at the top. The manual suggests packing the hinge plate out from the chassis using some M10 nuts, but by that time I got to that it was getting late and I couldn't face an unknown number of cold, dark hours undoing and refitting the hinges. I vowed to have another go at the doors after christmas when I would have at least 4 days straight to play with them.
Just before christmas my lighting pack arrived at Graham's house. I drove over to pick up the box of new toys and had the chance to look at his build too. It was good to see it, and the black gel coat body he's got hanging from the garage roof looks very nice indeed. Unfortunately it transpired that Alan at Premier Wiring had sent the wrong rear lights for me so I'll need to get those swapped, but otherwise everything else looked intact.
In the final days before christmas I had some time off from work and spent one of them in the garage looking at the body panels again. This time I went for fitting the boot lid as it seemed much easier than the doors. I trimmed the edge of the boot lid and removed the excess lip on the body so I could fit the rubber seal, then I sat the boot on the body. Neither the manual nor the video give much explanation on getting the hinges or the handle fitted properly so I had to improvise a bit. The general hinge position is determined by two recessed areas under the boot lid, but to get them parallel I resorted to running two bits of string down the boot lid and using the number plate light recess to measure from to ensure they really were central and parallel. It seemed to do the trick and using the hinges themselves as guides I marked where the holes should be. Here the first bodywork mistake was made. The first hole I drilled in the boot lid was too close to the lip on the body and would have fouled it with the stud and nut in place - damn! Fortunately even after moving the hinge down a bit the hole will be covered up by the hinge, so a bit of body filler will be required before painting, but nothing too serious. I was unable to fix the hinges in place as it appears the stud threads are imperial not metric (why would they do that?!!). The boot handle needs to be central and a number plate's height down from the light recess on the lid. Not having a numberplate or its measurements to hand (and itching with fibreglass dust from trimming the body and lid) I gave up on that job too and put it on the post-christmas "to do" list along with the doors. I'll try and get these jobs done before I go back to work in the New Year.
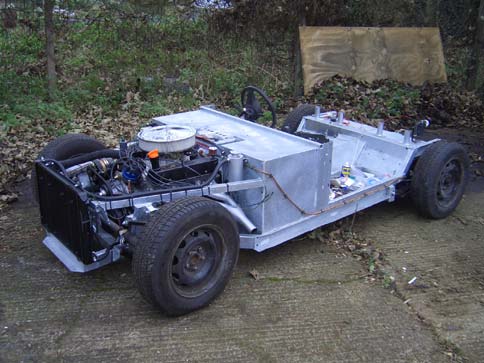
Drives under its
own power!

Temporary petrol tank
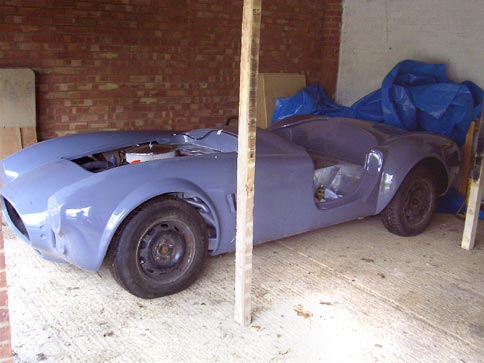
The body is on...
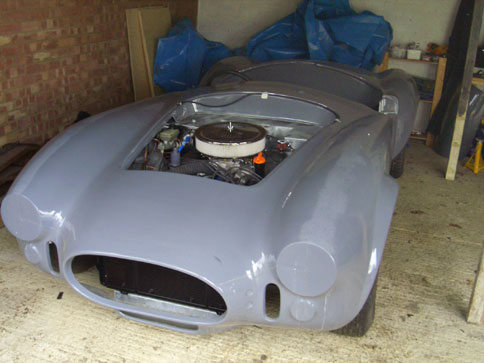
... and transforms
the car's looks...

...it's a proper car now!

Rear sill needs trimming

Lining up boot hinges