

Doors & lights
9th February 2006
Christmas seems a long time passed now and as the New Year gathers momentum, so is the build. The past month has been a veritable hive of activity in the garage as I'm pressing on to get the car ready for summer.
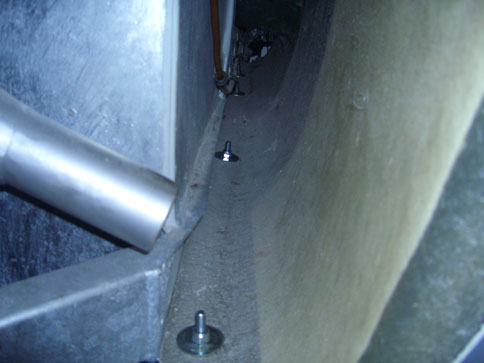
First up was tackling the doors again. If you recall, the previous hanging of the driver's door left it unable to close properly and completely out of line with the body. I took the door off and packed the hinge plate away from the chassis using some M10 nuts as the manual suggested. This made an instant improvement - the door no longer caught on the front wing, and the hinge sat better in the cutouts allowing it to (almost) close properly. The top of the door also lined up much better at the front. The sills were still preventing the door closing fully, but required far less persuasion to let it sit correctly.
Graham offered to help lend a hand holding the sills while I drilled and bolted them so he came over one Saturday morning and we set about pinning them in place. He pushed the sill in to roughly line up the door (to the point were we thought the rest could be adjusted with some shimming of the door) and I drilled the holes. The first thing we noticed was that the sill has to come down quite a way to meet the chassis and despite using enormous washers caused some alarming cracking noises as it was bolted into place. We decided to drill an extra hole in the sill under the middle of the door and put another bolt and large washer to help spread the load a bit. The second thing was that by pulling the sill down, it made the gap under the door quite large. We fiddled with the door on the hinge a bit and it seemed to sit a bit better, but I don't think it'll ever be perfect. In fact, later on I pulled out some photos of the demostrator at Pilgrim and it also has a larger gap at the bottom of the door, so I guess that's just the way they come.
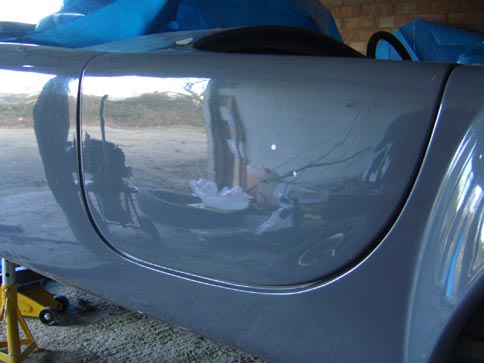
The passenger side door was a similar story, but after packing the hinge out and pinning the sills down, we were actually pleasantly surprised by how well the door sat. The Pilgrim body mould is taken from a crashed-repaired original car and the passenger side opening is apparently a slightly different size to the driver's side. This was evident when fitting the doors as the gaps on the driver's side are definitely tighter than the passenger's. However, the gaps aren't the vast chasms I was led to believe and although they're not the perfect 4mm of modern production cars, I don't think you'd notice from a distance. There is still a bit of fine tuning to do on both doors, but I think all it needs is a couple of washers and a bit more time and I will have them looking pretty reasonable. All told, the job hasn't been as bad as everyone makes out.
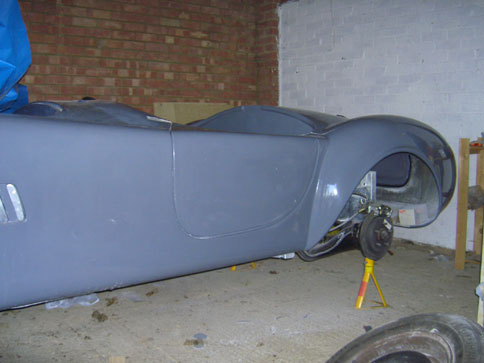
Moving on, the next job was fitting the boot lid properly. I had ordered some 5/16" UNF nuts for the boot hinges, but to my horror I found that although the thread that goes through the body is 5/16" (the one I measured), the two threads that go through the boot lid are smaller (ARGGH! WHY?!!!). A quick trip to the local ironmonger fortunately resulted in the right size nuts (1/4" for reference). Bolting the hinges on, I found a fatal flaw in my drilling. In moving the hinges back a bit so as not to foul the lip of the body I had inadventantly positioned them so that they couldn't be opened once bolted onto the boot lid - whoops! Out came the drill and I slotted the holes to give some more adjustment and finally I was able to bolt the boot lid onto the car, and it worked! Fortunately the hinges hide the hideous mess I've made of the holes.
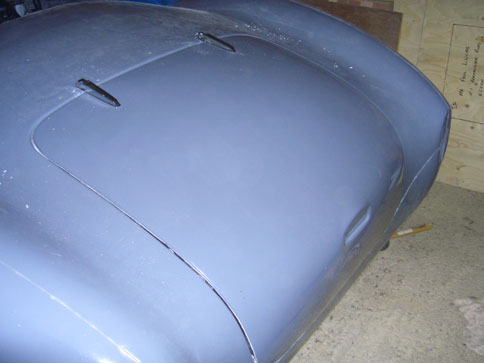
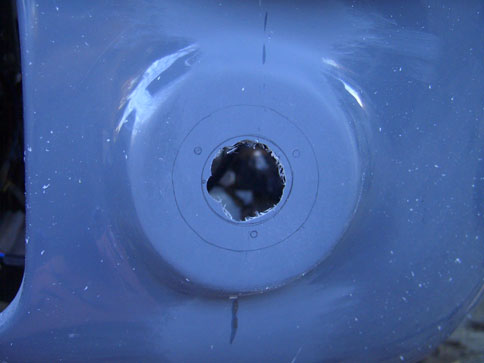
That done, I started on fitting the headlights. Cue another couple of hours of wet'n'dry "fun" removing the flashlines at the front and I marked up the holes and proceeded to cut them out. I used the rubber seal from the headlights as a template for the hole then with the aid of a jigsaw cut a rough circle and then filed it to the right size. The headlight bowl fitted in nice and tightly and I marked up the mounting holes and drilled them and attached the self tapping screws. The headlight unit and mounting bits are a bit of a jigsaw and once I'd figured out how the thing screws together (and a heart stopping moment where I thought the logos and writing on the lights would end up at 45 degrees instead of vertical) I plugged it together and screwed into the body. Alan had supplied the wiring for the lights, but the connections to the Pilgrim loom need a bit of tweaking. The plugs he's supplied are a bit big and I need to extend the earth wire too. Another job for the list!
After the success with the headlights, I fitted the front indicators. These were a bit of a pain to drill the hole for as the rubber seal isn't a simple ring you can draw around. They need a hole that's about 1/2" in diameter, any smaller and the rubber seal won't fit through, any larger and there won't be anything for the mounting screws to screw in to. I ended up using a circle of fibreglass I had cut from the headlight bowl (testing the holesaw I'd bought for the roll hoops!) to help mark the center of the indicator moulding by eye, then used a 1/2" washer to draw round to give me the hole for the indicator itself. All cut out, the indicator fits a treat. I need to make an earthing wire for this too, but that can also wait for later.
Fitting the side repeaters was a case of marking a hole (again using the rubber seal as a size guide) and then a bit of filing, before pushing the repeaters into place. The repeaters (which are from a Fiat apparently) have little plastic clips, but the fibreglass tub is too thick to let them click into place. However, they are pretty tightly wedged in so hopefully they'll be ok. If not, I might look at chopping some of the plastic back on the clip to give a bigger groove to clip onto the body.
The rear lights have gone back to Premier Wiring and I've ordered the correct sort from Auto Electric Supplies as Alan wasn't prepared to price match. While waiting for those to arrive (which will hopefully be tomorrow) I set about fitting the windscreen washer bottle, wiper motor and wheel boxes. The washer bottle is very easy as it's just a bracket with two self tapping screws (or nuts and bolts in my case as I didn't find the screws hiding in the box until afterwards!). The plastic bottle then slides on top. I need to figure out how to tidy up the wiring to it as it drapes across the engine at the moment.
The wiper motor was a real pain to fit. I started by cutting the bundy tube (who thinks of these names?!) to the specified lengths and attaching the wheel boxes. Holding up the motor and bracket I was pleased to find that Pilgrim have already kindly drilled the holes to mount it. Unfortunately the position is not easy to get to with tools and heavy motor in hand so after performing a variety of pilates-style body positions I finally ended up head first in the footwell trying to locate the bolts while holding the bracket and trying to avoid dropping the heavy wiper motor on my face! Eventually it was held in place enough to allow me to get out the footwell and tackle the rest in a more civilised upright position. At this point I realised the bundy tube (being straight) was not going to allow me to mount the wheel boxes in their correct positions and it was too stiff to bend by hand in situ. Leaving the motor in place I disassembled the wheel boxes and tubing and tried a different tact. I drilled the holes in the scuttle and mounted the driver's side wheel box first, then used some spare (and bendable) copper piping I had left over from the fuel lines to determine the bend required for first section of bundy tubing. Using the copper pipe as a template I bent the bundy tubing and attached it back to the motor. Success! I attached the second wheel box and remeasured with the middle section of tubing, this required chopping a little, but was a much easier process. Reassembling everything I stood back to admire the handiwork. I haven't wired them up yet, so there is still the possibility that they may try and wipe the bonnet clean rather than the windscreen, but fingers crossed!
Next steps are trying to get the rest of the holes cut in the body to get it ready for painting. I've got the nudge bars and overriders on order from Pilgrim as well as the fuel cap. While I'm waiting for those I'm going to take the brave step of tackling the roll hoops. I started marking up the pilot holes, but haven't yet got the drill out...

Doors on...
...sills fixed down...
...gaps not perfect, but
probably never will be
Not too shabby
(from a distance!)
Boot lid finally fitted

Marking up for
headlights
Marking up for
indicators
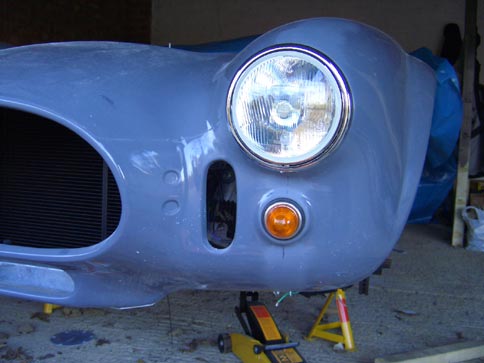
The final result
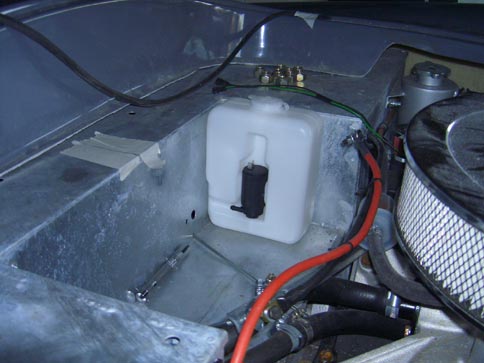
Washer bottle in place
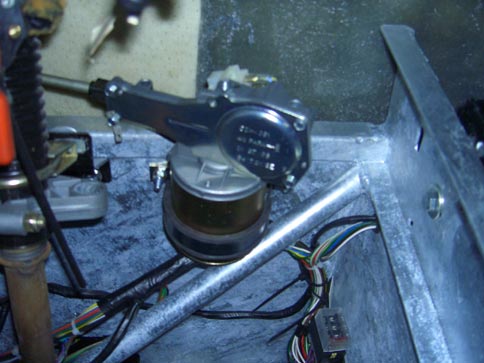
Wiper motor mounted