

Autumn already?
20th November 2006
It seems an awfully long time since I wrote anything on this site, and I'm ashamed to see it is 5 months since my last update. 5 months!! Where the hell has the time gone?! Well, two places actually - the first is I moved house and job not long after my last update so between the DIY and settling into my new employer the cobra has had a very sad and lonely existence in the garage. To celebrate my return I've decided to give the site a revamp - I hope you like it, do let me know what you think.
So, where did we leave off? Ah yes, I was clinging to the fragile thread of life having sustained horrific injury to my person. Well, as you probably can tell I managed to pull through in what can only be described as a medical miracle. I now have a 1 inch scar on my left thigh (what do you mean 'tiny'?) that is still a bit red looking, but looks like I'm out the danger zone for now. That being the case I'll rewind the clock back to June and fill you in on what's been happening.
Having rested up and plucked up the courage to return to the garage I set about finishing off mounting the fuel cap. Carefully (very carefully!) I finished trimming the fuel pipe and finished off filing out the hole in the bodywork for it. Then I pushed the pipe into place. The fuel cap simply pops on top and I rotated it about a bit to try and get the cap lined up straight along the body and have the bolt holes in the base neatly aligned too. Using the extra paper washers provided I managed to get that sitting nicely too. I marked and drilled some pilot holes for the cap, but I need to get hold of some stainless steel bolts to hold it on. Preferably the sort with the domed heads and allen key recess.
In order to move myself along a bit I booked the car into my mate's paint shop in Nottingham and arranged to hire a van with a tow bar and a trailer to get it there. In the week leading up to the date I kept finding little jobs that needed doing - one of which was drilling the holes for the harness mounts. There are no instructions for doing this since the manual assumes you'll be fitting normal seatbelts (pah!) so a little off piste action was required. First step was to try and figure out where the top mount should actually go. Using the centerline of the roll hoop tubes for front-to-back alignment and using the centerpoint between each hoop's legs for the left-to-right alignment I marked the position and taped the top mount of the harnesses to the body. Having made a makeshift seat from bits of wood and a gardening mat I sat in the drivers side and rested the harness over me. It seemed to sit centrally so I got out and drilled the necessary hole in through the body and the steel strap bonded into the tub.
I inserted the eyebolt, but it didn't seem to sit right on top of the body, it wasn't quite flush and I was sure I'd read somewhere that the eyebolt must be metal-to-metal contact all the way and I had a layer of body tub fibreglass in the equation. I phoned Pilgrim and they confirmed that I needed to enlarge the hole in the body (but not the metal strap) to accept the base of the eyebolt. I bought some small grinding stones for the drill and proceeded to enlarge the holes in the fibreglass layer. That done I dropped the eyebolts in again and they sat much better, resting only on the metal strap. I still need to make some brackets to provide a tie to the chassis, but that can be done after painting.
Next up was trying to put some more rivets in the body to hold it to the chassis more securely. Around the scuttle the chassis is all warped and lumpy from the galvanizing process and there are a number of large gaps between the body lip and the chassis. I got a tip from somewhere (apologies - I forget who suggested it) that you could use a hydraulic jack between the transmission tunnel and the underside of the chassis scuttle and ease the worst of the lumps out of it. This seemed like it might work so I duly crammed the jack into place and started pumping the handle. I had to add a piece of wood under the jack to stop the transmission tunnel bending (d'oh!) and with that in place the jack did manage to push the scuttle plate into a sensible position. Unfortunately, on lowering the jack again the scuttle plate neatly popped back into it's original warped position. No amount of jacking or over-jacking seemed to push it into a sensible shape so I gave up with that idea. I think I will have to put some long bolts through it and pack the holes with sealant, unless anyone can suggest a better idea?
I had better success packing out where the body meets the scuttle on the driver's side to improve the shutline of the bonnet. You may recall that the Pilgrim mould is slightly out of shape along the bonnet resulting in a gap that you an see the engine through. A 10mm wedge shape of wood under the drivers side of the body scuttle resulted in a much neater line.
One of the jobs I wanted to do was try and fit the rear arch liners and inner sills. Although the manual claims these just pop into place and sealed with a bit of Sikaflex, it was quite clear on holding them up that some DIY fibreglassing would be required to do a proper job. The inner arches are quite a crude shape and it took some trimming to even get them inside the body. Once roughly in place it became quite clear how much of a lie the manual was telling. There is no way you could trim them neatly and just seal around them, the gaps are huge! Running out of time before the bodyshop appointment I decided to leave this job until after painting rather than rushing it. I'll just have to be extra careful not to get any resin on the new paint job.
The day for painting came and I turned up at the van hire place to collect the van. You can tell things aren't going to be good when you introduce yourself and explain what you are there for and you are met with that scared rabbit look that says "oh *@#$, someone forgot to collect the van with the tow bar from our other depot". Not amused, I waited for an hour for the van which allegedy was only "10 minutes away". After an hour I gave up hope of a) the van arriving and b) being able to collect the trailer, load the car, drive to Nottingham and get back before the trailer people wanted their trailer back. I cancelled the whole trip and stomped back home.
And there the story pauses for a while. Just after, I moved house and job within space of a couple of weeks and the two have combined to prevent any further work on the car. However, things got going again a few weeks ago when I got a call from Roger at Shinybitz.
You may recall that I borrowed some pipes to make the necessary holes in the bodywork while I waited for mine to be made. Originally Roger had said it would be about 5 weeks, instead 5 months later (almost to the day) he called to say they were finally finished. I decided it would be best to go and collect them in person rather than send a cheque and hope for a parcel in the post, so I arranged to head up the following weekend to his workshop in Nottingham.
The week after, I started up the M1 and half way up Roger calls again to say he's running a bit behind. "Behind?" I questioned, given that a week ago the pipes were apparently all done and ready to be collected. He said there was some finishing up to do and it would take him a couple of hours. I said that as I was already most of the way there I would come and wait for them to be finished. Needless to say, I was not impressed. When I got to his workshop I discovered my exhaust pipes in bits on the floor - he still had to weld the collectors on and make the pinch bolt brackets to hold everything together. It also transpired that he had not made the baffles (nor had any materials or time to do it) or have any of the fitting kit I had ordered either.
With a polite exterior, but fuming inside I went and found a coffee shop to sit in for a couple of hours. 5 months for delivery is unacceptable in any case in my view, but compounding the fact by lying about them being complete is simply an unbelievable way to treat your customers. I'm afraid he will not be getting any recommendations from me. It's a shame because the finished articles are very good.
On my return Roger had completed one pipe, but was still working on the other. By this time another customer had turned up for something else that Roger had started in the morning, but not completed so the pair of us sat outside his workshop waiting for him to get on with things. Finally, three and a half hours later than planned Roger had completed the pipes (minus the baffles). I paid him the balance for them and got a promise that the fitting kit et al would be in on the following Tuesday to post to me...
...Three weeks on I am still waiting.
So that brings us up to the current day. I am yet to re-book a body shop appointment and with christmas rapidly approaching I'm not sure it's going to happen before the New Year. However, collecting the exhausts has got me back into the frame of mind. I've ordered some seats and vinyl from Richfield which should be ready in a few weeks. I'm getting them to trim some door cards, so I need to buy/make some which in turn means I need to work out whether I'm having door handles or whether I'm going to make this push-button solenoid thing work.
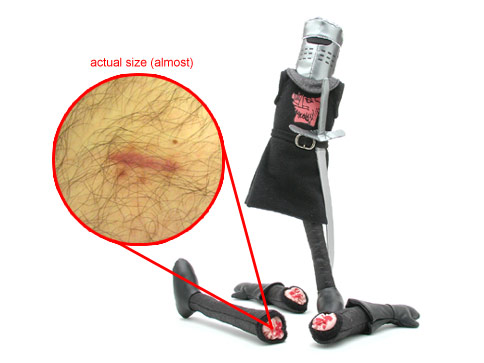
Lucky to be alive

Fuel cap in place...
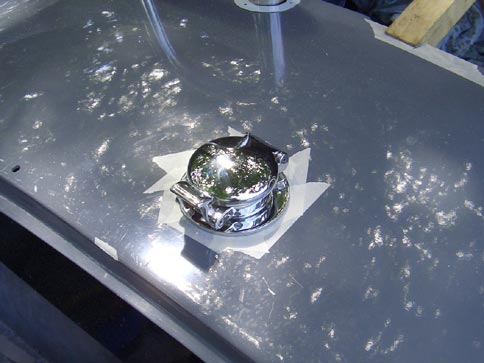
...and shut tight
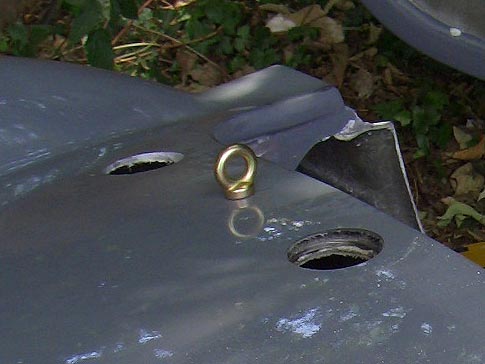
Top mount, the first attempt

Mounts corrected - looking good!
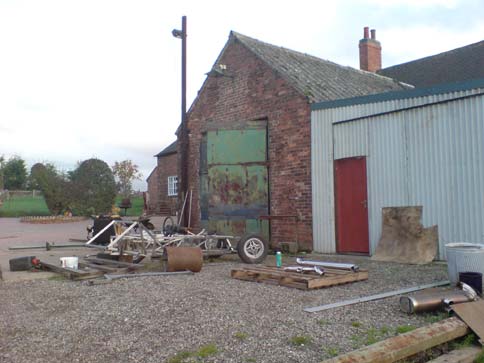
Shinybitz HQ
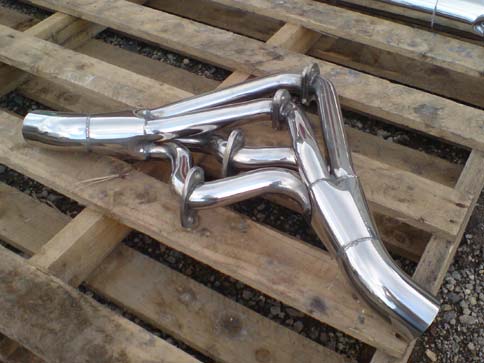
My new headers (at last)

Exhaust - minus innards