

Wiring part I
16th June 2005
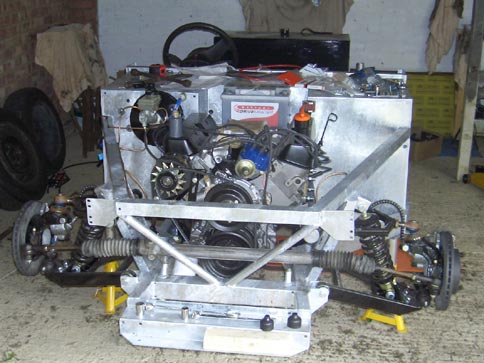
Now the engine is in, it's time to start connecting it up to hear it run for the first time. This involves bolting on the alternator and carb, connecting the battery, wiring the ignition together, plumbing in the radiator and running the fuel lines. Frustratingly, I have so far managed just one out of six - bolting on the alternator.
The clutch problem I was having last time turned out not to be a problem at all. Having put some posts on the forum, Tony Merrick offered to talk me through it if I rang him. After explaining what I'd done (i.e. followed the instructions!) we came to the conclusion that I had done it right. Tony suggested I tried getting someone to push the pedal while I got under the car to see if it was working. In hindsight it should have been a blindingly obvious idea, but sometimes you can't see the woods for the trees! Anyway I did just that, persuading my fiancée to sit in the car and push the clutch. Lo and behold, it worked! I'm not sure the clutch is fully disengaging, but at least the basic mechanism is right. I can adjust it properly later.
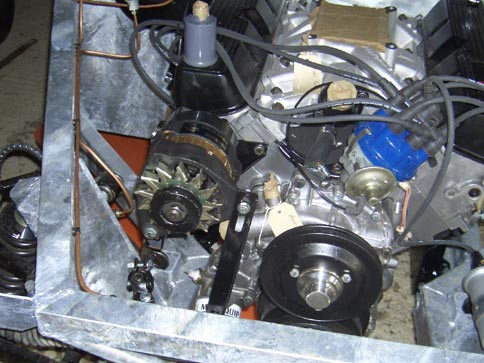
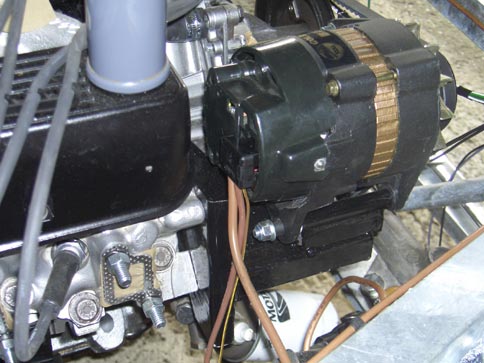
Having ordered all the nuts and bolts I needed, I fixed the brackets to the engine and bolted the alternator in position. The new setup requires a slightly shorter fan belt than the standard Rover item so a trip to the local auto factors later and the belt was fitted. A good tip here is go to an auto factors because they sell the belts by length. Halfords on the other hand only mark them by what car they are for - not ideal for a hybrid Rover/Ford/Pilgrim combo!
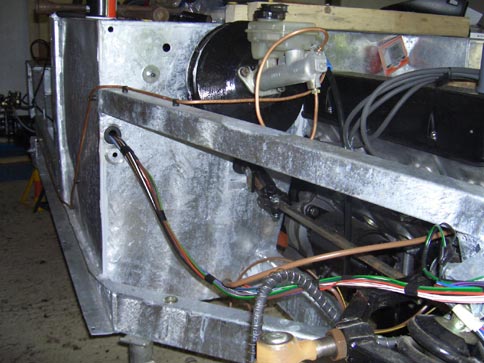
The next job I thought I would tackle was the wiring. In the packet the wiring loom looks quite intimidating. Out of the packet, it's not much better either. The recommeded advice is to lay the loom out on the car. Putting the fuse boxes in the driver's footwell, the loom unfurled in two main lengths, one into the engine bay, the other to the rear of the car. As if by magic the loom started to make sense. The various connections are logically bundled and so it was fairly easy to look at each bundle and work what most of them are. To feed the wires into the engine bay, I enlarged the existing hole in the bulkhead that's just under the top chassis rail to about 25mm, put a grommet in it and fed the front half of the loom through it.
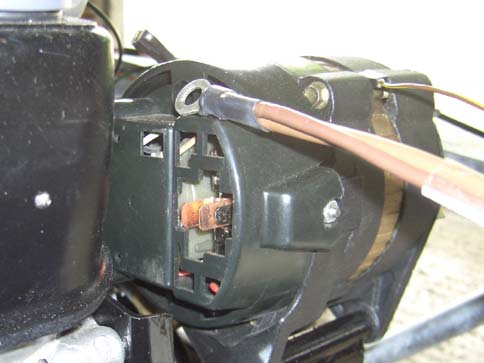
The first problem was connecting the main ignition cables. The alternator Jim supplied with the engine is a Lucas type and the Pilgrim loom is designed for a standard Ford item which has different connections. I phoned Jim to ask his advice and he kindly explained the changes necessary. The first job was to lop off the ring connector on the loom and solder on the terminals and plug supplied with the alternator.
Next job was to start wiring the battery. This proved slightly problematic as the battery cables I'd bought were too short (d'oh!). Instead I started trying to wire the various connectors on the steering column. The original Ford plugs need to be soldered into the Pilgrim loom as they are no longer available to buy new so need to be re-used. The ignition switch connections were straightforward, the loom provides a socket so all that is required is to solder on a plug to the ignition wires and plug the two together. The rest of the switches (wipers, lights and indicators) were slightly more problematic. For starters the loom just has bunches of wires terminated with female bullet connectors and the pack of bits doesn't have any male connectors to solder to the Ford wires. Secondly trying to start on the indicator switch revealed a certain mismatch between the numbers and colours of wires that the instructions said I should have and the reality I was holding in my hand. Not sure what to do about this yet, but as it's not critical to starting the engine I figured it can wait until later.
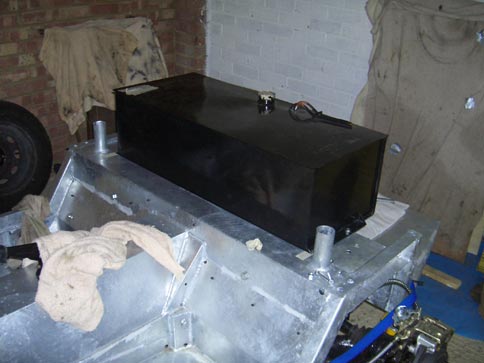
Running the fuel lines should have been a simple task, although I couldn't picture the route the instructions were trying to describe. Basically they need to run down the outside of the chassis rail on the passenger side and then turn in by the rear wheel and run under and up the chassis to the pre-drilled holes near the fuel tank. I haven't had a chance to put this on yet, but I'll put up some photos when it's done to explain better. Fitted the fuel tank on the back and made up some brackets to mount the fuel pump too.
I trial fitted the radiator (need to make some brackets to hold the top of it). Again this is a simple job, I just need to buy the right size/length hoses and plug it together. I decided to order the header tank from Pilgrim. I could have gone for an expensive chrome version from another company, but I decided to leave tarting up the engine bay to come later. It arrived in a bare, just-been-welded metal state and looked a bit sorry for itself. A couple of coats of silver Hammerite and it doesn't look half bad. I need to get a radiator cap of the right pressure, for the cooling system which means finding out what the right pressure is - another job for the list.
So that's where I am at the moment - six jobs, all half done, all needing finishing to bring the V8 to life. It's going to be another busy few weeks.
Nearly ready to run!
Alternator mounted

Coil mounted
Round peg, square hole...
...Square peg, square hole

Laying out the loom

A heap of wires
to connect
Running the loom
into the engine bay
Fuel tank mounted